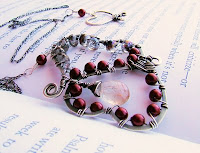
Brass has been gaining more and more popularity with jewelry artists, as vintage style jewelry comes back in vogue, plus for some artisans you can still get the look of gold with out the cost. An alloy of about 70% copper and 30% zinc and sometimes a small addition of other metals, the usual color is a pale yellowy-gold with the most sought after brass components being reproductions of victorian era brass stamping, filigrees, charms, wire, jumprings and chain all arriving at your home after you buy them looking all shiny and brand new! So the question inevitably always comes up... "how do you get that beautiful aged look old brass has?"
There are several methods for oxidizing and aging brass and I have tried my fair share. This is a list of the ones I feel work the best for achieving this much desired look.
No matter which method you choose...
The first step you should take when aging any brass is to clean the piece well and remove any dirt or oils that may exist. Even if it looks clean I advise not skipping this all important step for your best results. I know a lot of people recommend using fine steel wool for this but personally I don't care for the brushed or satin finish look it leaves on the piece, plus it does not allow you to get into all of the nooks and crannies and may even leave an ulgy pattern of deeper scratch marks if the steel wool is not even. The method I use to achieve this it to completely scrub up the piece using a non abrasive material, like a soft brush, both front and back, in warm water with a few drops of dawn dish liquid, rinsing well in clean water afterwards and dry with a soft cloth. The next step is to soak it in a solution of 1 tablespoon of salt to 1 cup of vinegar for about an hour then rinse thoroughly in warm water. *If you know the piece you want to age has a laquered finish you have to remove that finish first in order for aging methods to work. 1 part laquer thinner to 3 parts denatured alcohol and a toothbrush works wonders for this and once the laquer has been removed make sure to follow the steps above to finish cleaning the piece. Cleaned pieces should be aged as soon as possible afterwards.
Safety Note: I want to caution you when using either the baking or flame (heat) methods detailed below to make sure your brass is unlacquered. Lacquer is very flammable and can do a lot of damage if it catches on fire. This is also why it is very import you clean your pieces first and remove any lacquer that might be present. Whenever you are using chemicals to age your brass, or remove laquer always use rubber gloves, safety glasses and good ventilation.
SALTWATER METHOD
You can use a small paintbrush to brush a mixture of 50/50 salt and water over the entire surface of the item, front and back. This oxidizes the brass, which is actually what happens to the metal naturally over time only this will speed up the process and can give you some very natural looking results including that beautiful aged green patina. It will take a bit more time and patience on your part to get the desired look though then some of the other methods described below. You can let your piece set for several days/weeks adding a new coat of the saltwater daily and checking to see if the color is what you would like. Make sure to rinse the piece thoroughly in warm water once you are happy with the results. I would say only use this method if you have a little time on your hands and only want a little darkening or a lighter aged patina on the brass.
BAKING METHOD
If you have access to an oven, a cookie sheet and some foil this is a great methoed, especially if you want to age several pieces at the same time. Preheat your oven to 450. Lay your pieces out on a cookie sheet lined with foil. Bake at 450 for about 30 minutes, some pieces may take longer - up to an hour or so - and since not all brass is created equally some pieces might darken quicker then others so it is best to keep on eye on it and remove them from the oven once the desired color is achieved. There is a chance some brass can turn multi-toned with blues and purples. If this happens once you remove it from the heat and it cools completely you can dip it into a 50/50 solution of vinegar and water and rinse thoroughly in cold water right afterwards. Make sure you just do a quick dip or you may end up removing a lot of the oxidation and end up having to rebake the piece. Of course if your piece has come out too dark this will also be a good way to remove some of the oxidation too.
FLAME METHOD
You don't have to slather your work in harmful chemicals to get some great color but you have to experiment like never before and work with the flame heat. Not unlike the baking method brass reacts to heat by turning a beautiful mellow gingerbread aged color or more toward the coppery reddish color depending it's makeup, holding a piece over an open flame just speeds up the process and allows you to play around a little bit more for different aging effects. With the baking method you tend to get a more uniform coloration to your pieces and with the flame method that is not always the case, but it can make for some gorgeous aging effects more like natural aging would appear. A small tourch or gas stove burner works pretty well and you will also need a pan of cold water and somthing to hold your piece over the flame with. When I use this method I hold the piece above the flame, never in the flame, with a pair of pliers and watch for it to change colors. This can happen pretty rapidly so as soon as you see the changes remove it from the flame and immediately emerse the piece into cold water. If it is not as dark as you would like you can repeat the process again and if your pieces comes out too dark you can remove some of the oxidation with the 50/50 solution of vinegar and water and rinse thoroughly in cold water right afterwards or buff off some of the oxidation. One thing I should add about the flame method is your piece might loose it's temper (strength) due to the extreme and uneven temperatures of this method making the brass soft and pliable, so I don't recommend it for wire, chain, jumprings or other small pieces.
AMMONIA VAPOR
Ammonia vapor produces a greenish brown oxide finish on your brass, like a coppery color and is said to be as close as you can come to a natural patina. You will need a plastic container with a tight lid. I use the white pickle’ buckets used by preservers and home-brewers and you can get them at most hardware stores, or any other well sealed plastic container will work. Pour a cup of full strength or “Clear Ammonia” into the bottom of the bucket. Full strength ammonia (not common household ammonia) can usually be obtained from the grocery store. It is an extremely unpleasant fluid and should only be handled in well ventilated areas or outside. If you are only going to age one or two pieces the easiest way is to stretch a nylon cloth across the opening to suspend your pieces above the liquid making sure they are not touching eachother. For more items I recommend a piece of plywood to make a shelf that will sit a few inches off the bottom. You can sit on three blocks of wood or bricks to ensure it remains level. Place the items for antiquing on the plywood or nylon cloth and snap the lid in place. Depending on the temperature and humidity the antiquing will take minutes or hours so take the occasional look to see how it is progressing being careful not to breath in any of the fumes. The color will darken a little and inclusions of verdi-gris will form when the items are removed from the container. Rinse well in warm water and dry with a soft cloth.
An alternative method is to place your brass items in a large plastic bag with a rag soaked in ammonia – just make sure they are not touching each other to avoid spotting and get an even finish. Also, if it is warm and humid ammonia vapor can condense on the inside of the bag and run onto your brass producing an uneven finish – so only use this method if you want a very light patina and don’t need to leave it in the bag too long. Always advoid breating in any of the ammonia fumes and only do this in a well ventilated area and be sure to rinse the piece well in warm water once it is removed from your container and dry with a soft cloth.
AMMONIA BATHS
You will need a covered container, pennies and common household ammonia. Fill the container with common household ammonia and put some copper pennies in the bottom, the more the better! Put your pieces into the ammonia along with the pennies but make sure they are not touching. Cover up the container to create a decent seal, it does not need to be airtight. The amount of time you leave it in the ammonia will determine on how much aging you see. Soaking it overnight will give you kind of a varied brass and brown finish, a few days will give you a great rich brown color and five days or more will give you that great green patina! Once you're happy with the results, remove the piece, rinse in warm water and dry with a soft cloth.
VINEGAR VAPOR
You can use the exact same method as described above for the ammonia vapors to age your brass using plain ordinary household vinegar instead of ammonia and it is a lot less caustic for you personally. Either plain white, balsamic, or cider vinegar purchased at any local grocery store can be used. I have never had anyone tell me one is better or worse then the other for this as far as final results go. I think the main difference for me between the ammonia and vinegar vapors were the aging results were achieved much faster with the ammonia and ammonia gave the brass a richer more natural aged color. Vinger vapors usualy take several hours to an overnight stay in the container to achieve darker results, but, I feel the vinegar vapors gives the brass a beautiful gingerbread color aged patina and it is a lot safer. Make sure to rinse your piece well in warm water after removing it from the vapors.
Tarn-X
If you read the directions on a bottle of Tarn-x tarnish remover it will tell you not to use this product on brass. Why? Because it turns it dark! Make sure you apply the product to both the front and back of the piece and clean afterwards according to label directions for other metals, it will usually take a day or two to achieve the desired results. I have had good success with this product and it turns the brass a nice dark rich natural looking aged color but it is important to make sure your piece is well cleaned or you could end up with pieces that will not turn or ones with patchy uneven color.
BURIED PATINAS
Just about equivalent parts of lemon juice, white vinegar, ammonia, and a bunch of salt all mixed in with wood shavings. Mix the liquid ingredients first, add the salt, then SATURATE some wood shavings with the mix. The shavings should look wet. The longer it is buried the better the patina and the evel of 'acretions' that form on your piece. For alot of patina (including lots iof greens and blues, leave the piece buried for 10-14 days. If left to their own the piece will 'grow' several large acretions that are easily knocked of if not handled properly. However, if it is your intent to NOT have the 'acretions' on your piece, let the piece air 'dry' and then lightly brush the wood shavings (that will become attached to your piece) off with a disposable paint brush. Another way to create a 'textured' patina (with the same formula - less the wood shavings) is to soak the mixture in furniture strapping and 'wrap' your piece with the strapping only 'moist', NOT saturated, and then 'bury' the piece in an air tight plastic trash bag for 10-14 days. You'll get similiar results as the wood shavings but with the texture of the strapping echoed on your piece. This way is quite nice and produces a 'pattern' that would be otherwise dificult to achieve. Use gloves and eye protection AT ALL TIMES and DO NOT breathe the vapors. Keep the remainder of the mixture well sealed and out of the way and access of kids or any animals and DO NOT dispose of into any body of water. The wood shaving mixture can be used for quite a period of time, but will lose it's 'potency' after awhile. Also, for more blues, use more ammonia, for more greens, use more vinegar and lemon juice. Do this work in a VERY WELL ventilated area and observe all cautions at all times. Have fun and prepare to be pleasantly surprised. One last word; if the results are not what you want, rinse off the old patina and try again trying longer (or shorter) buried times. Also, if you have the patience, DO NOT let your piece dry out too quickly and you will notice the patina changing (almost daily) as it matures. I have a piece that has changed as many times and into as many different colors of blues and greens as you can imagine. Final word; if you want to 'preserve' the patina as you see it, coat the piece (after it's COMPLETELY dry) with a polyurethane paint product and use whatever level of 'glossiness' you want to achieve by using that level of polyurethane, ie, glossy, semi-gloss, flat, etc. Be aware that no matter what you use to coat the piece with, your piece will get darker when the coating is applied.
AGING WITH CHEMICALS
There are a number of product out there that are made to give brass that aged look and a few you can mix up on your own. I will name just a few that I have tried and had good results with or heard good things about but I do not endorse any of these methods/ products specifically. Please keep in mind most products like this will only work on (clean unlaquered) solid brass or copper so if you are in doubt I would try one of the other methods first. PLEASE remember safety first when using any type of chemicals!
Copper carbonate 3 parts by mass
Copper acetate 1 part by mass
Ammonium chloride 1 part by mass
Sodium chloride 1 part by mass
Cream of tartar 1 part by mass
Acetic acid (10%) 8 parts by mass
Mix in a big glass jar (about 1 litre). Will froth and foam as the acetic acid reacts with the copper carbonate. Stir. Leave to settle. Stir. Leave to settle. Stir. Leave to settle …. Until it settles down for good and has a thin creamy consistency. Paint mixture onto the brass and watch the change happen. The longer you leave it, the more developed it will be. Once you achieve the desired results rinse well in warm water and dry with a soft cloth.
http://www.jaxchemical.com/
makes a line of products for darkening, coloring, cleaning, polishing, finishing and even adding the green patina some desire. All JAX metal finishing and polishing solutions are easy to use, produce authentic, consistent results, require no heat or electricity, are water-based, contain no sulfur, are non-flammable and react within seconds. Produces a permanent, authentic, antique finish on copper, brass and bronze.
Acid Dripping
This method involves dipping clean and unlacquered brass in a proprietary antiquing solution. These solutions are a dilute mixture of acids, copper sulphate and sometimes additional chemicals to improve color consistancy and resistance to contamination. The process is substantially the same regardless of which brand of solution is chosen.
Liver Of Sulphur
It's toxic and can be noxious, so follow directions. This works great although it does smell like rotten eggs. Another caution with this prooduct is a friend of mine uses it frequently on her silver jewelry creations and found other jewelry pieces that were just in the same room as where she was using this product tarnished quite badly.
Houseofantiquehardware.com sell a product creatively named "Brass Ager" that works very well it comes in a ready to use 8oz size that I used on brass hardware.
Also one from rockler.com named "Brass Darkening Solution" It changes color gradually so you can control the darkness that a friend of mine swears by.
Hubbard-Hall has Mi-Tique Patina . This is a room temperature process for copper and brass.
For a less then permenant aged look RUB 'N BUFF The Original Wax Metallic Finish work nice. Minwax and Reniassance wax also makes some waxes/gelstains that are commonly used.
After you have aged your brass
One thing you might want to try is buffing the "high spots" on your piece making those areas brighter while leaving the gorgeous darker patina in the deeper areas, this will give it more of a true worn and aged look. How much or how little buffing is up to you and the look you are trying to achieve with your piece. I use a buffing wheel with my dremel tool for this but you could also use something as simple as a fingernail buffer or jewelers rouge, stay away from any abrasives or steelwool unless you want swirl marks in your finish. When you are all done and happy with your results I have personally found the best way to protect them is with carnubia wax. I have also been told that Treewax, Johnson’s paste wax or even natural beeswax also works well.
I hope this has helped you with your brass aging process. Don't be afraid to play around and experiment a little to see what works best for you and if anyone has a better, new and exciting way they would like to share please drop me a note, I would love to add it. Good Luck!